Contributing with GitHub via command-line
Contributors

Questions
How can I contribute to an open-source project with GitHub?
What is the GitHub flow?
Objectives
Fork a repository on GitHub
Clone a remote repository locally
Create a branch
Commit changes
Push changes to a remote repository
Create a pull request
Update a pull request
Steps
-
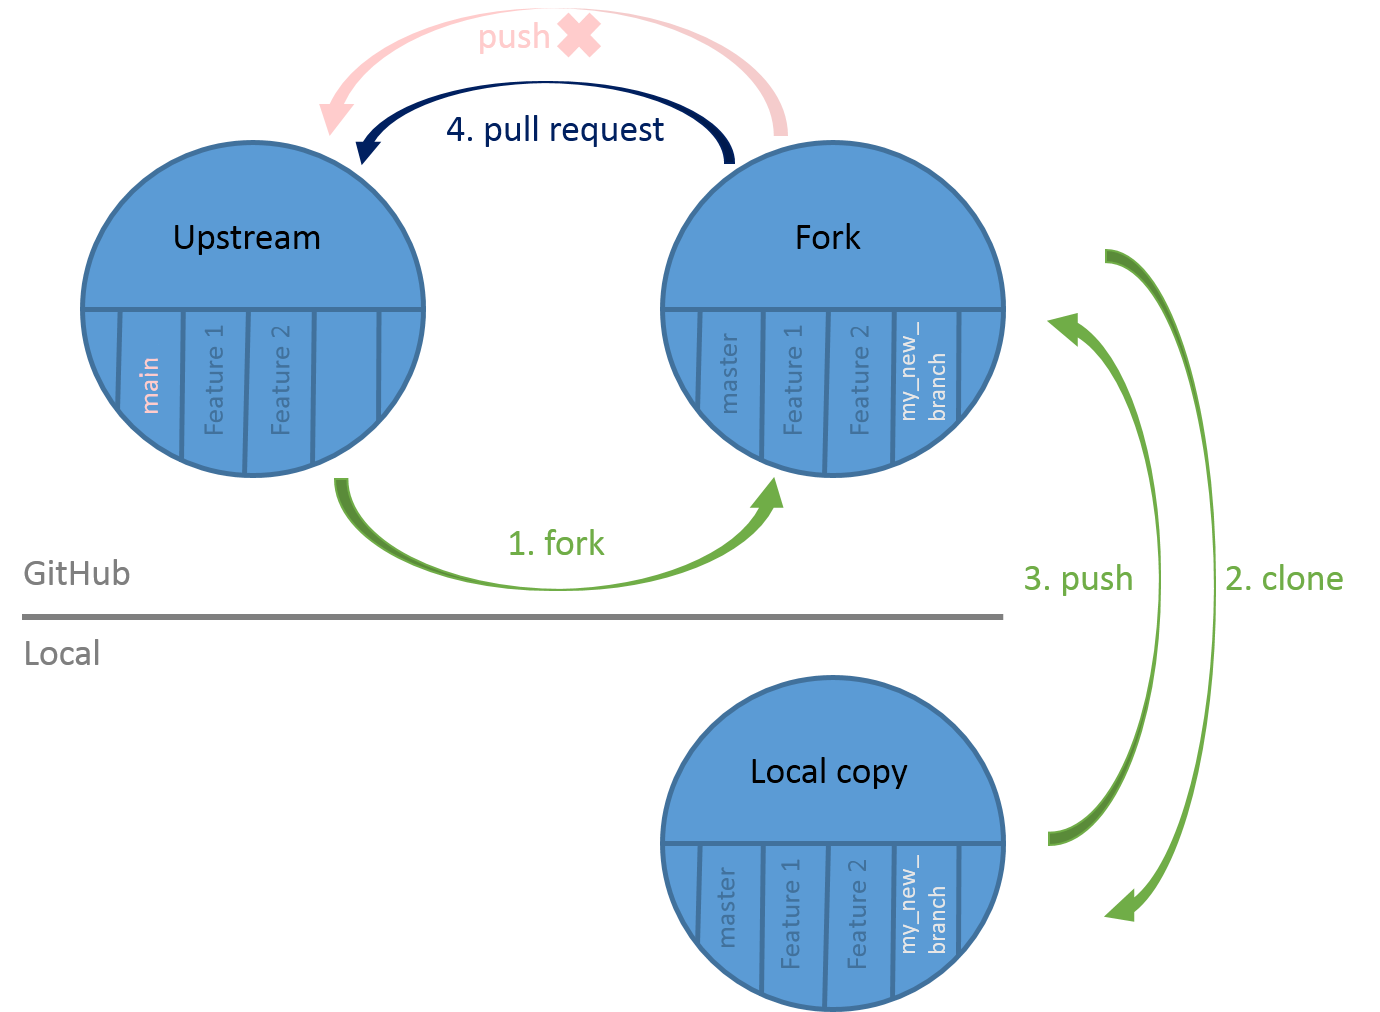
Fork (copy) a GitHub repository in your GitHub space
-
Clone your GitHub repository on your system
-
Create a new branch (one branch = one new feature)
-
Make your changes on this branch
-
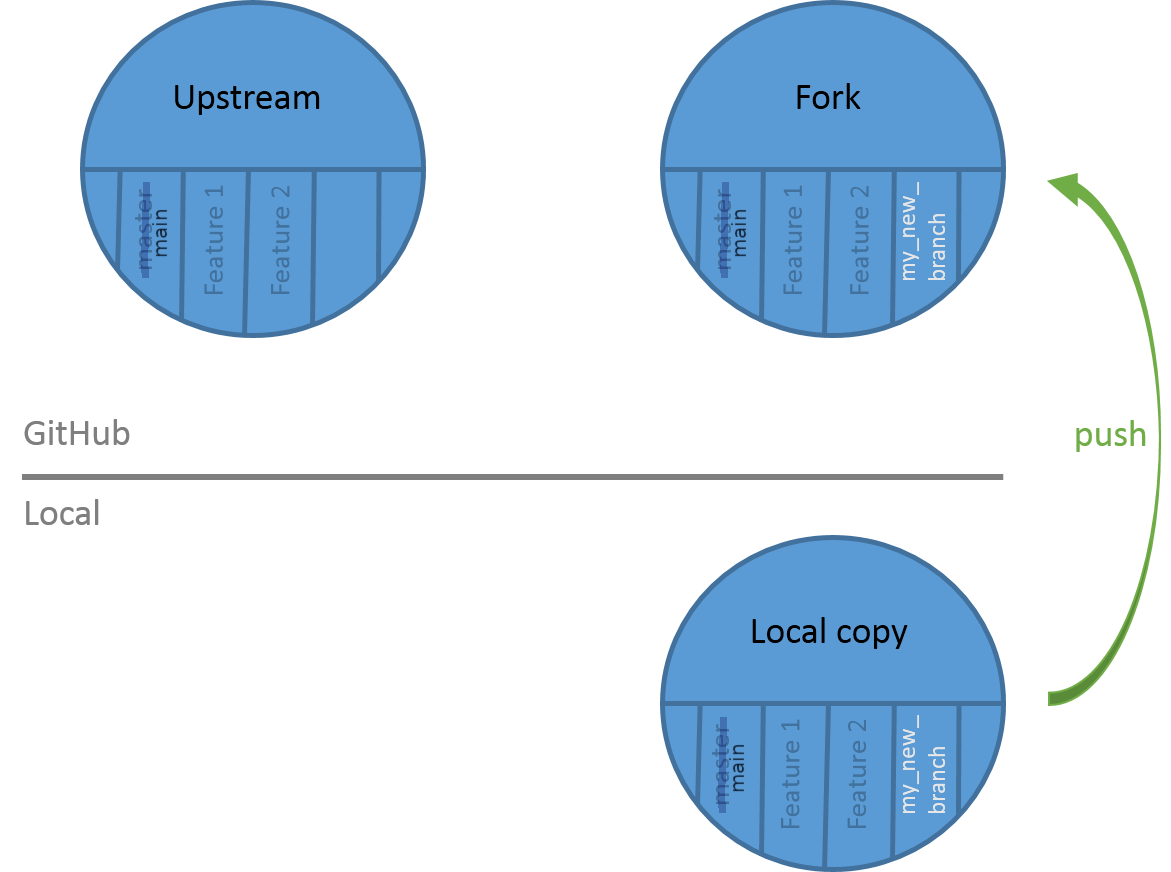
Push your branch on your GitHub repository
-
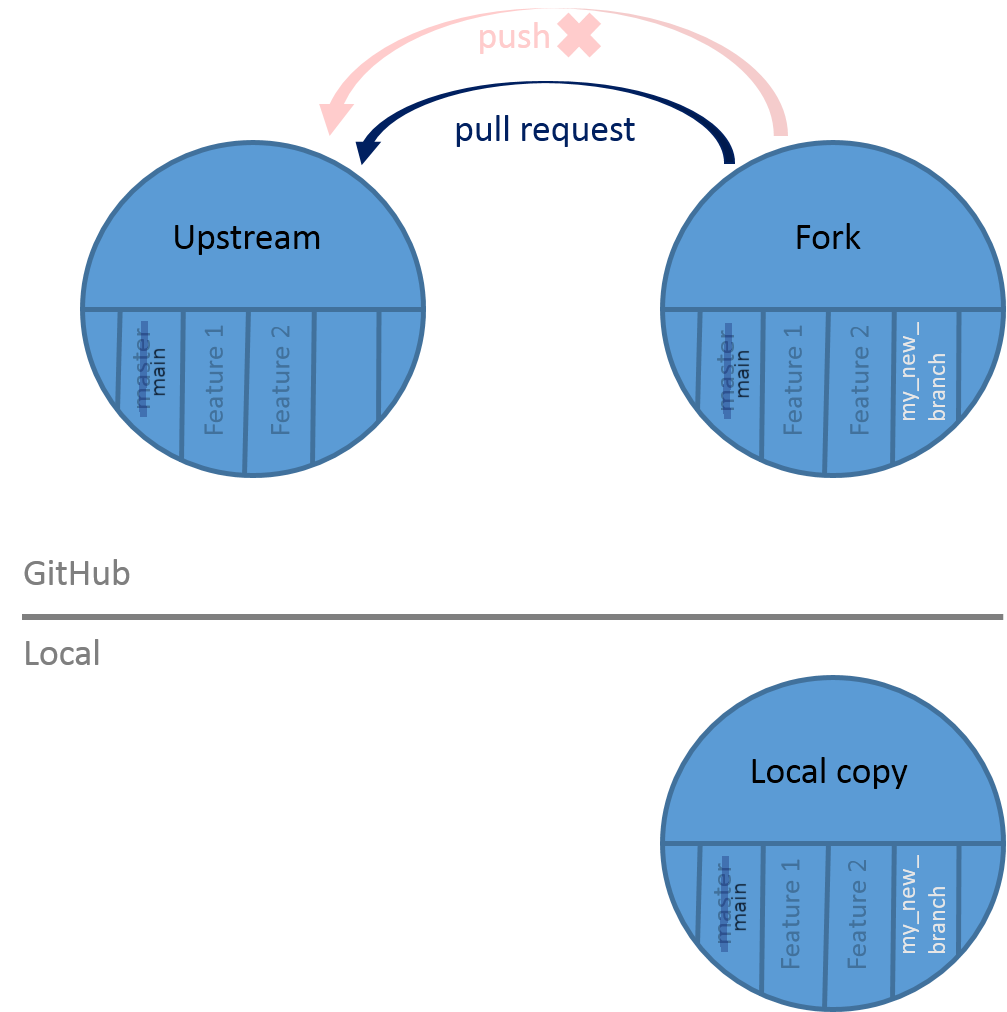
Merge your branch on the original GitHub repository
1. Fork a repository
Fork from a GitHub repository

Welcome on your fork repository
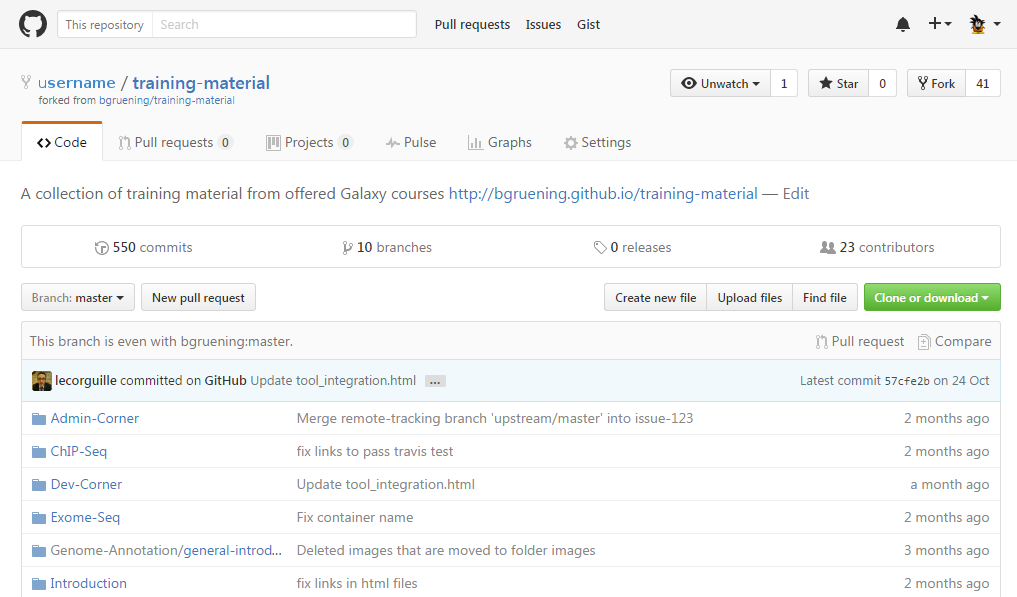
Welcome on your fork repository
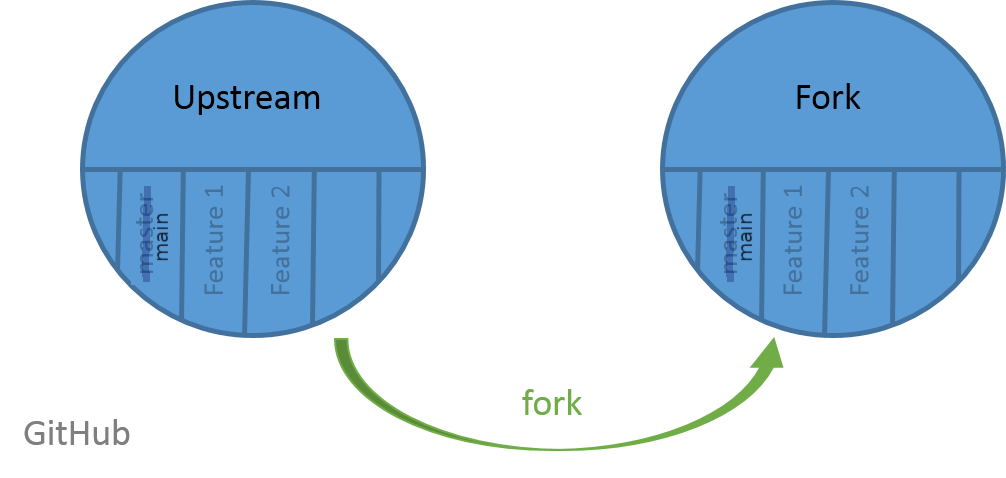
2. Clone your GitHub repository
Get your GitHub URL
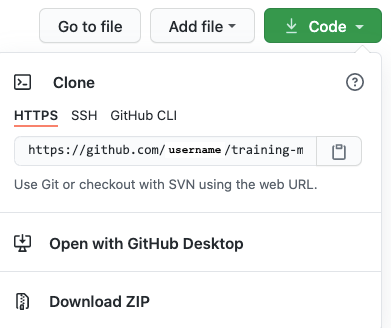
Clone your GitHub repository
On your terminal:
- clone your repository
$ git clone your_fork_github_url
- go into your repository
$ cd training-material
Clone your GitHub repository
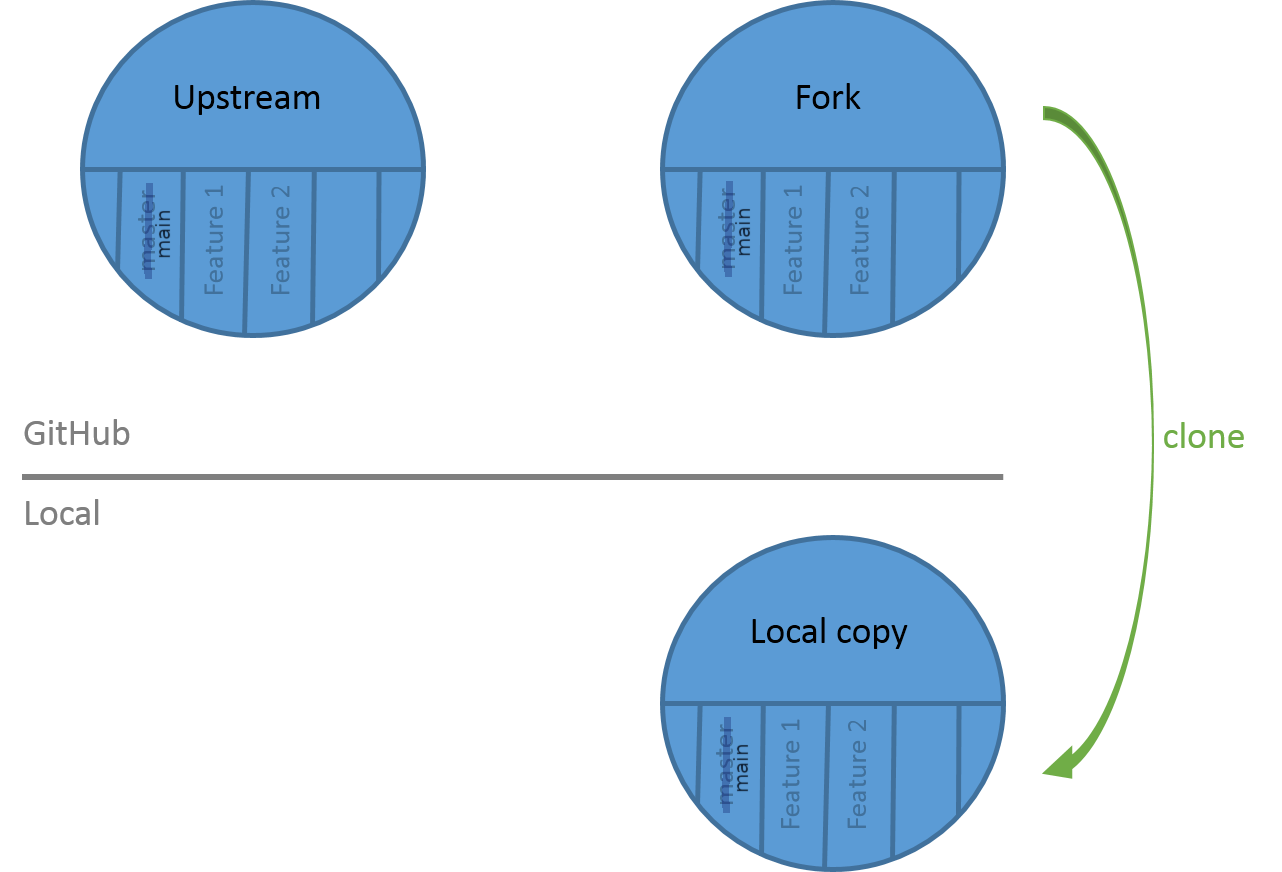
3. Make your changes
Create your branch
List your branches
$ git branch

  * main

Create a new branch
$ git checkout -b my_new_branch

Switched to a new branch 'my_new_branch'
Make your changes
List your branches
$ git branch

	main
	* my_new_branch

Make changes and commits
$ git add newfile1 newfile2 ...
$ git commit -m "my contribution"

Make changes and commits
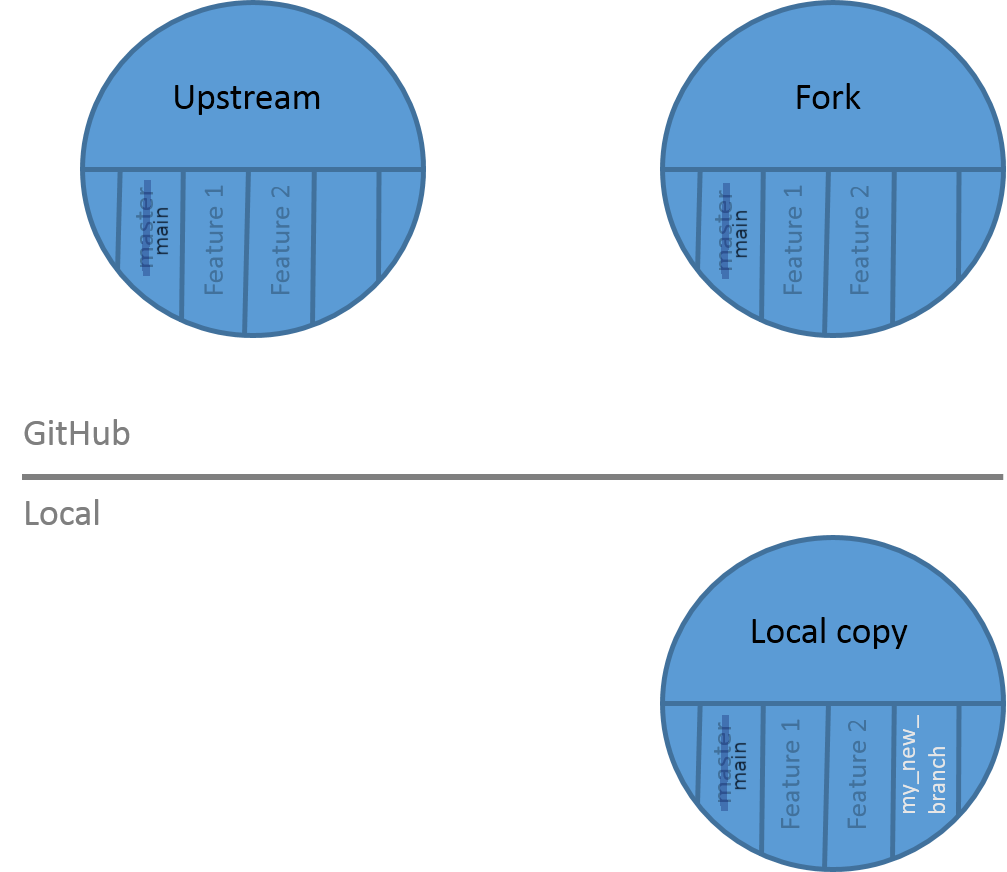
Push your branch on your GitHub repository
$ git push origin my_new_branch
4. The pull request
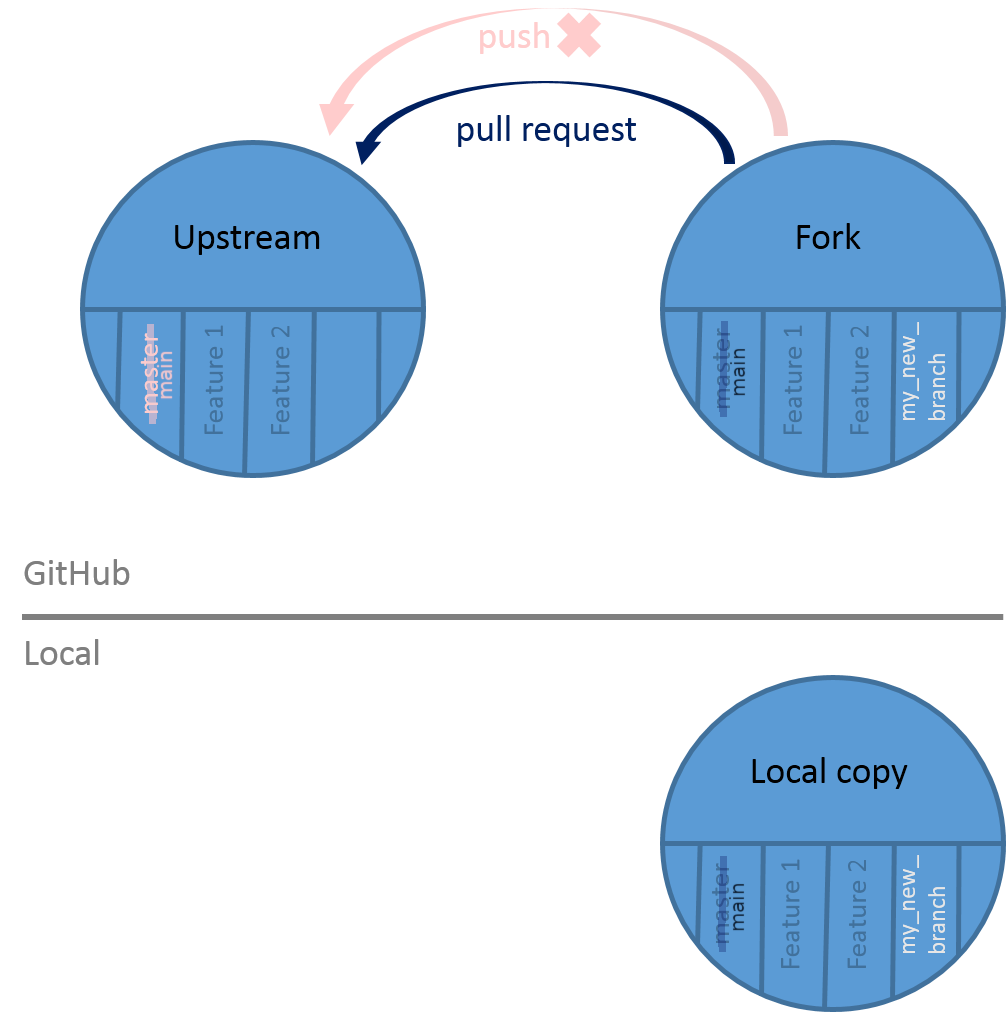
Can’t push on the original GitHub repository
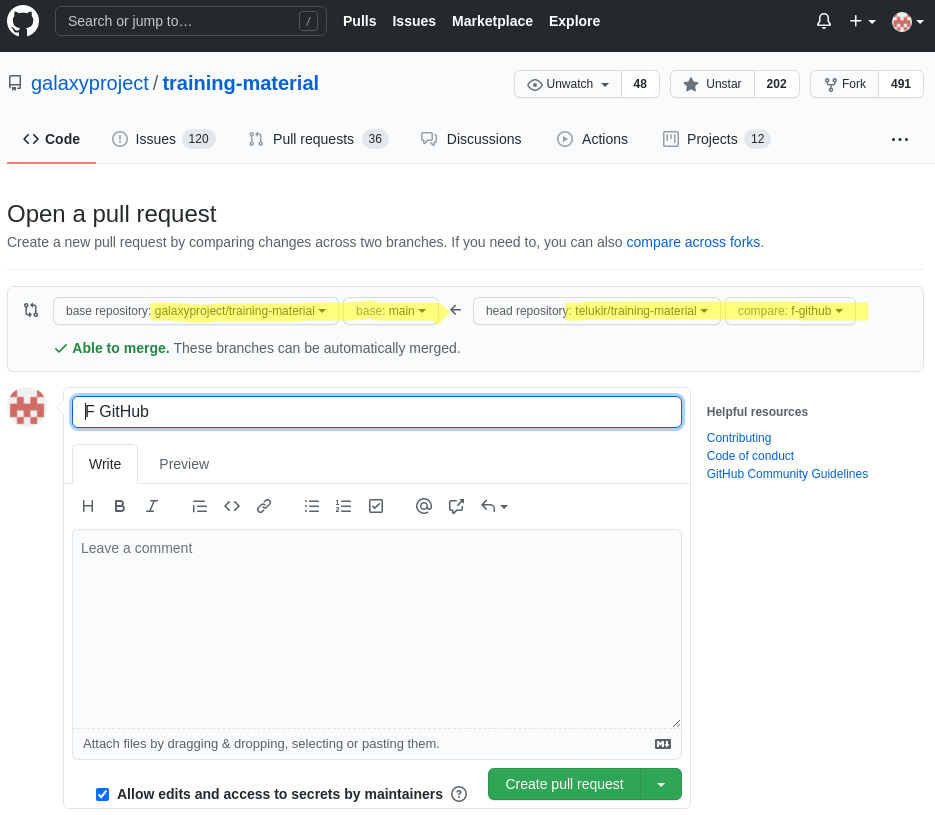
Create your pull request

Select the branches and write a description
Automated tests can be executed
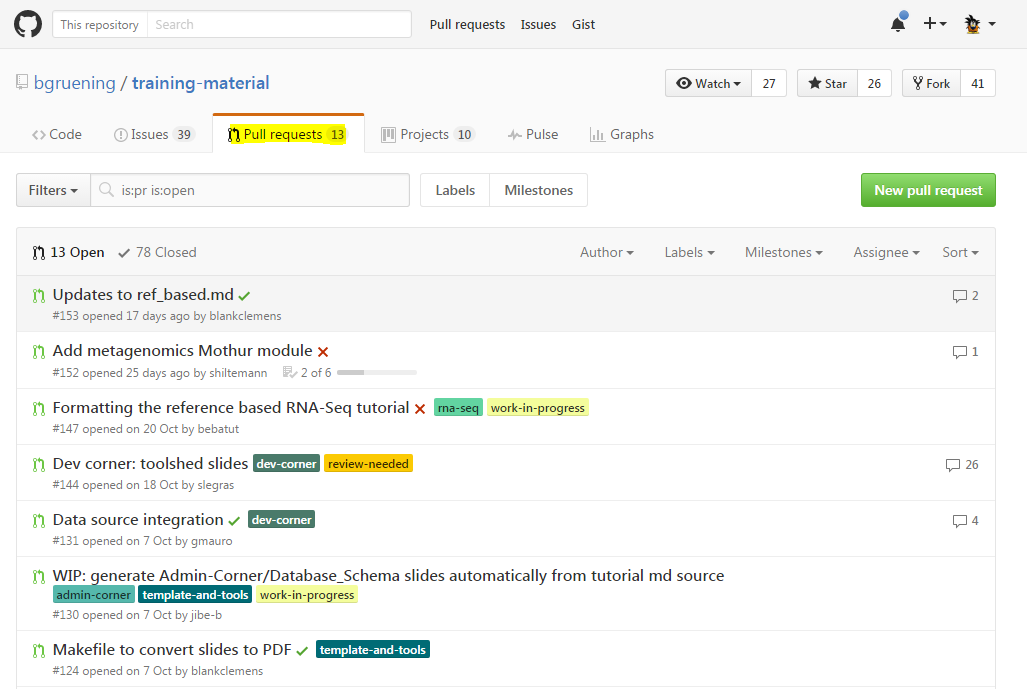
- Green check mark = OK
-
Red cross = not OK
Your pull request is accepted (congrats)
-
Automated tests are ok
-
Authors have accepted your feature
-
Branches are merged

Your feature is now in the original code
Your pull request need modifications (oops)
-
Automated tests are non ok
-
Authors have not accepted your feature
You have to make modifications on your branch and push it
Summary
Key Points
- Work on your fork
- 1 branch = 1 feature
- 1 pull request = 1 branch
- Be careful of the branch you're working on
- Check the automated tests
Thank you!
This material is the result of a collaborative work. Thanks to the Galaxy Training Network and all the contributors! This material is licensed under the Creative Commons Attribution 4.0 International License.